So… I wasn’t going to post a skirt tutorial because it isn’t really necessary to re-make the skirt; the one from the official Disney costume is really nice as it is! But, I did modify mine, so I figured I’d show what I did in case anyone else wants to do it too.
For the Grub’s costume, I modified the skirt to replace the belt so that it matched the top’s fabric, and I put in a full length grass skirt.

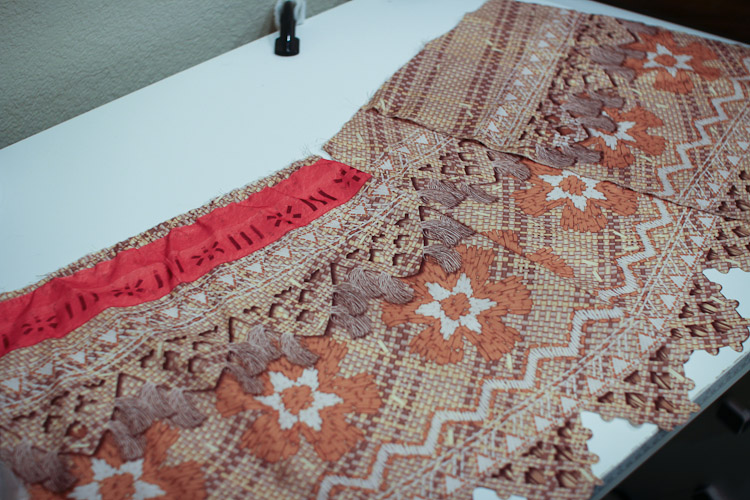
To start with, I painted a 35″ long strip using the bottom section of the stencil from the first tutorial, Painting the Fabric. I cut the strip to be 5″ wide, with the stenciling towards the bottom of the strip.

I cut 2 3″ wide pieces off the 35″ long strip, and set them aside. (These will be used to make the “knot” later.)

Next, I disassembled the skirt. The liner of the skirt is serged to the skirt, and then an elastic is stretched across the back to make the size adjustable. I used a seam ripper to remove the elastic, and then I picked out the row of stitching along the top. I saved the elastic so I could put it back in at the end.

Once the liner and skirt were separated, I set aside the liner.

I picked apart both side seams on the skirt. As you can see, I took one side seam completely apart, which wasn’t really necessary. I really only needed to seam rip until I got past the belt, so I did a bunch of extra work. On the plus side, having the skirt completely open made it a lot easier to work with!
The costume has the belt printed on the back, and a fabric belt on the front. After opening up the skirt, I removed the fabric belt.
To cover the printed belt, I measured the printed belt, and cut a piece of belt fabric long enough to span the skirt back. I trimmed the width down to 3″ and ironed in a 1/4″ narrow hem.

I pinned the belt on to the skirt back, covering the original printed belt, and stitched it down along the top and bottom edge.

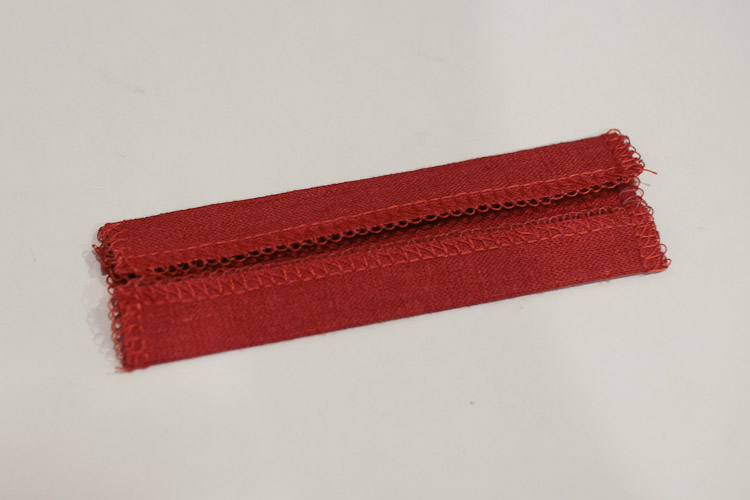
I took the remaining belt piece and ironed in a narrow 1/4″ hem.

I laid the belt on the front of the skirt and gathered the edges so that they matched up with the width of the belt on the skirt back. I also gathered up the belt in the middle where the “knot” would go. (Tying a real knot and making it look nice is tricky, so a common cosplayer trick it to fake the knot.)

I removed the belt and gently pressed with an iron to get the folds/gathers to stay. Then I machine stitched across the gathered “knot” area to tack it all in place.
 I cut a 5″ x 3″ piece of plain belt fabric…

and pressed the sides in, stitched them down…
and then wrapped it around the belt’s “knot” area. I hand stitched the knot in place.

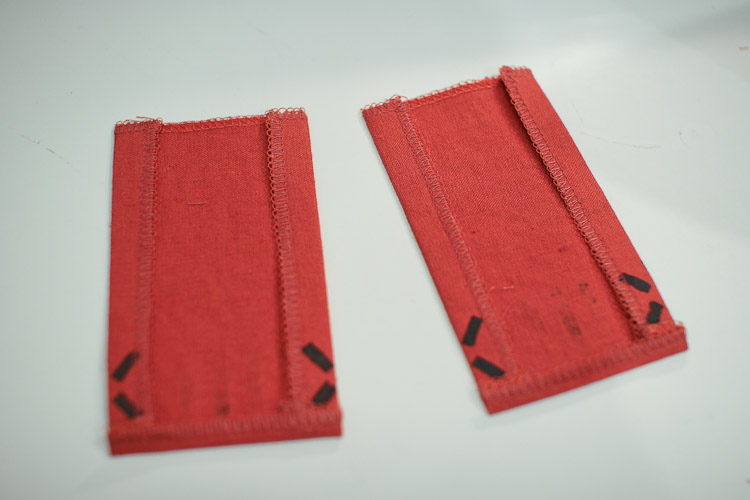
To create the knot’s ties, I took the 2 pieces of belt I set aside earlier and pressed in a hem on 3 sides, and stitched them down.

Then I pinned them to the back of the knot and hand sewed them in place.

And now I have a belt with a very nice looking fake knot!

Next up, re-assembling the skirt…
Moana costume tutorials:
- Part 1: Painting the Fabric
- Part 2: Making the Top
- Part 3: Modifying the Skirt
- Part 4: Reassembling the Skirt


